1 + 12
In this chapter we will learn how to install Python and run our very first command. You are of course also free to use your own Python installation. In that case it is best to check the Gurobi documentation to see how to properly install this program.
The easiest way to install Python and the Spyder editor at once is by installing Anaconda, which is a software package that includes Python, Spyder, and various other software applications. In the block below, you can find an outline for installing Anaconda.

After installation, you can see all the newly installed applications using the Anaconda Navigator. You can open the navigator by searching for the Anaconda Navigator in the Start menu (on Windows) or the equivalent on MacOS.
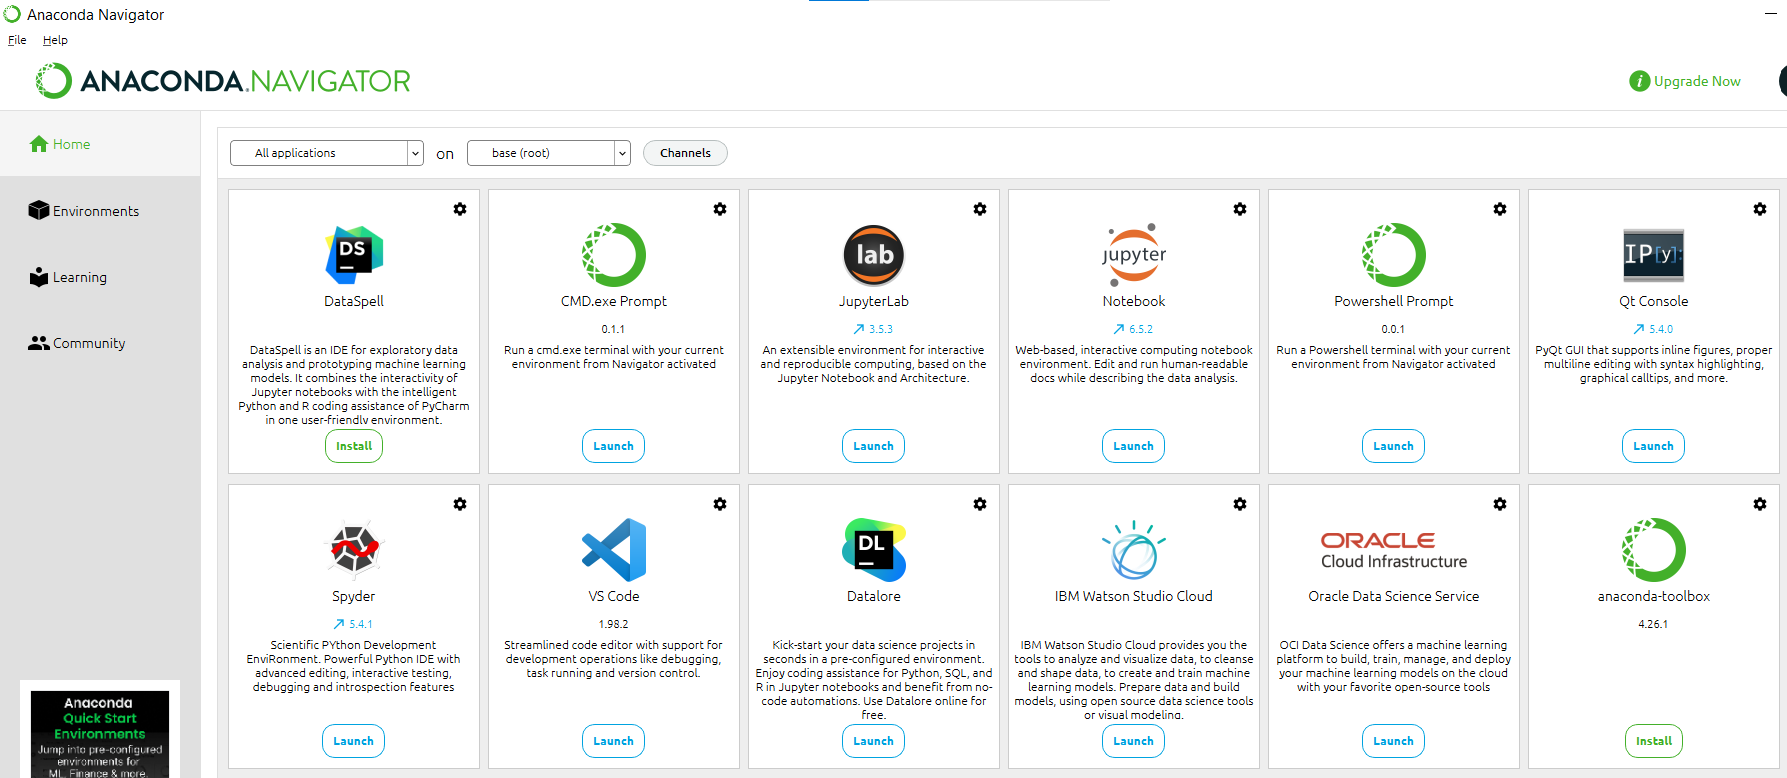
To create Python code and scripts, we will be using the Spyder application, which you can open by clicking on Launch in the Anaconda Navigator or by searching for the Spyder application on your computer directly. We note that there are many other applications that you can use to create Python code with (such as Visual Studio Code and Jupyter Notebook; two other applications also installed in the Anaconda distribution).
Once you have opened Spyder, you should see an application that looks like this:
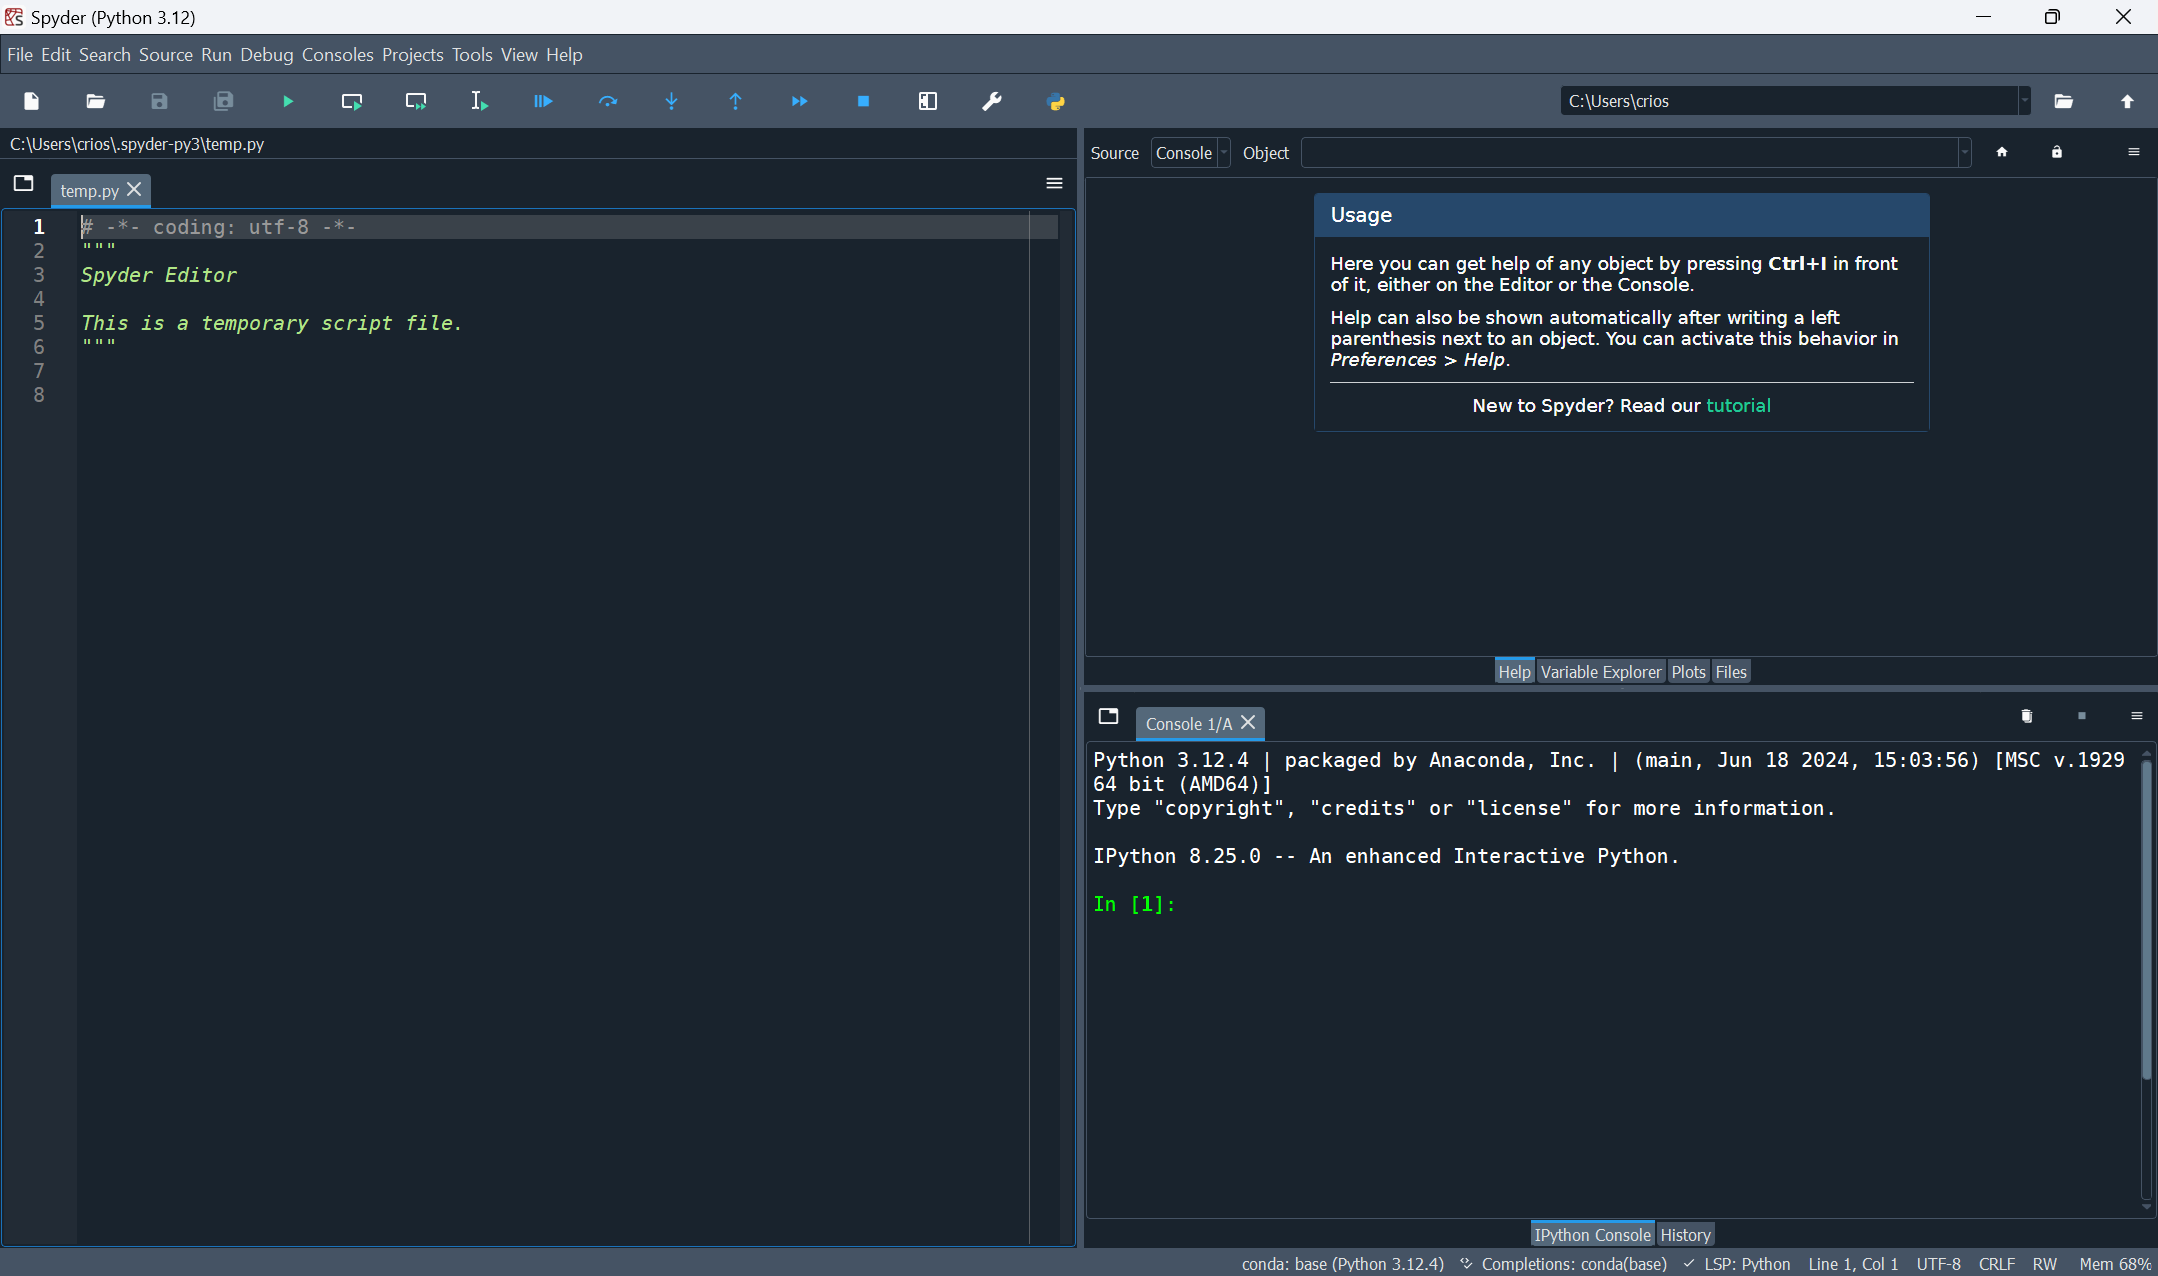
In the bottom right pane you see a console with IPython. IPython is short for Interactive Python. We can type Python commands into this console and see the output directly. To find 1+1 in Python, we can use the command 1+1, similar to how we would do it in Excel or in the Google search engine. Let’s try this out in the console. First, click on the console to move the cursor there. Then type 1+1 and press Enter. We will see the output 2 on the next line next to a red Out [1]:
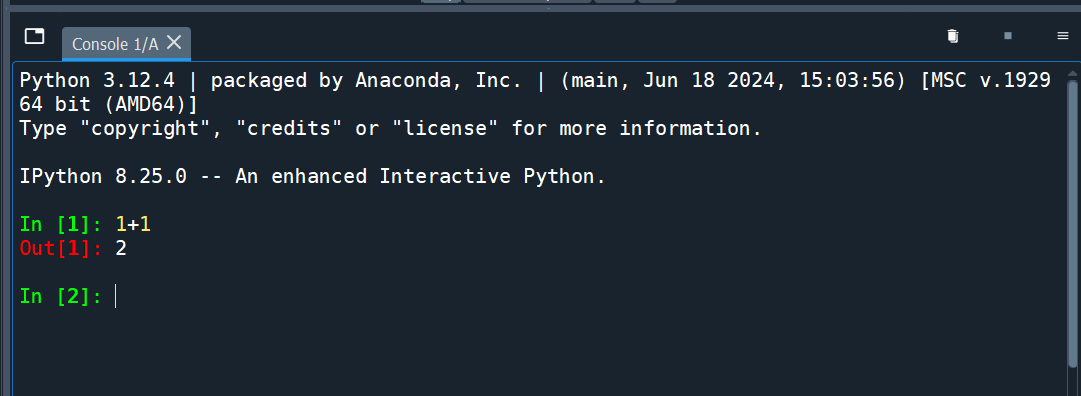
The red Out [1] means this is the output from the first line of input (after the green In [1]). The second command will have input In [2] and output Out [2].
Typing commands directly into the IPython console is fine if all you want to do is try out a few different simple commands (like we do at the start of the next chapter). However, when working on a project you will often be executing many commands. If you were to do all of this in the interactive console it would be very easy to lose track of what you are doing. It would also be very easy to make mistakes.
Writing your commands in Python scripts is a solution to this problem. A Python script is a text file with a .py extension where you can write all of your commands in the order you want them run. You can then get Spyder to run the entire file of commands (or only a part of them).
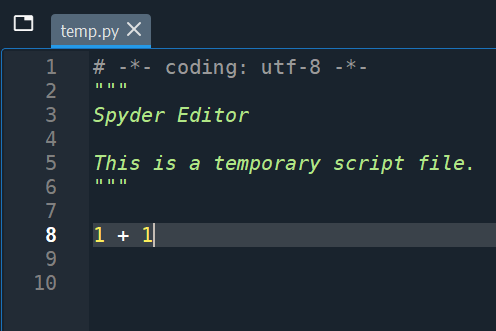
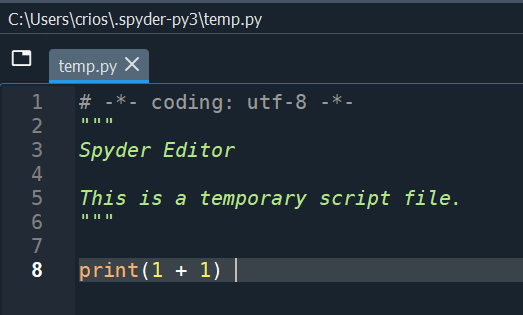
In Spyder, in the left pane you see a file open called temp.py when you start up Spyder. This is an example Python script. We can ignore what is written in the first 6 lines of the script. In fact, you can remove these lines if you want. We can add our 1 + 1 command to the bottom of the script like this and save it:
In the Toolbar there are several ways to run this command from the script. For example, you can run the entire file, or run only the current line or selected area. If the cursor is on the line with 1 + 1 and we press the “Run selection or current line” button, then we will see the command and output appear in the IPython console, just like how we typed it there before. Using the script, however, we have saved and documented our work.
If you try run the entire file, you will see runfile('...') in the IPython console with the ... being the path to the Python script you are running. However, you don’t see a 2 in the output. This is because when running an entire file, Python does not show the output of each line being run. To see the output of any command we need to put it inside the print() function. We can change our line to print(1 + 1) to see the output when running the entire file:
When you run the entire file you should now see a 2 below the runfile('...') command. We now know how to write and run Python scripts! In the next chapter we will learn more Python commands.
In this book, we won’t always show screenshots like we did above. Instead we will show code snippets in boxes like this:
1 + 12
The top part is code and the bottom part in gray is the output of the executed code. There is a small clipboard icon on the right which you can use to copy the code to paste into your own Python file to be able to experiment with it yourself.
Based on the above Anaconda installation, we will next explain how to install Gurobi, which is a software package that can solve (linear) optimization problems via Python. We assume in the below that you already have Anaconda/Python installed on your system as in the above steps.
If you get stuck anywhere in the installation process, then you can find more information on Gurobi’s Quick Start Guide.
Visit the Gurobi website and click on the register button. Open the registration form and make sure that you select the Academic account type, and select Student for the academic position. Register with your TIAS e-mail account.
Download Gurobi from the website. Note that you need to login with your Gurobi account before you can download Gurobi. Select the distribution that corresponds to your system (e.g., Windows or macOS), and select the regular “Gurobi Optimizer”, not any of the AMPL variations. Unless mentioned otherwise, download the most recent version.
Run the installer and follow the installation steps. At some point, the installer may ask whether to add Gurobi to your execution path. This is probably useful to accept.
You cannot use Gurobi without a license, so you need to apply for a license. As a student you can request a free academic license; take the Named-User Academic one. After you have obtained the license, you need to activate it for your Gurobi installation. If you open the license details on the Gurobi website, you can see what you need to do: open a Command Prompt (Windows) or Terminal (MacOS) and run the grbgetkey command with the code that corresponds to your license. This command will create your license file. Make sure that you remember where the license file is saved. The default location suggested by your device is probably the best choice.
Note that the grbgetkey command will check that you are on an academic domain, so you need to perform this step on the university network (possibly via a VPN connection). Once installed correctly, you can also run Gurobi without an active VPN connection.
Gurobi should now be correctly installed, but we also want to be able to use it from Python. Therefore, we need to install Gurobi’s Python package. Open the Anaconda prompt application (can also be found in the Anaconda Navigator) and run the following commands one by one (first line + Enter, second line + Enter).
conda config --add channels http://conda.anaconda.org/gurobiconda install gurobiThe Anaconda prompt application is NOT the same as the Command Prompt (Windows) or Terminal (MacOS)
If you don’t have the Anaconda installation, then you can do something similar with the pip command, most likely, for those familiar with it.
Now you can test whether everything is setup correctly. Open an interactive Python session, for instance using Spyder. Try the following commands by adding them into a script (make sure there are no spaces at the beginning of the lines) and press Enter.
from gurobipy import Model
model = Model()
Set parameter Username
Set parameter LicenseID to value 2715549
Academic license - for non-commercial use only - expires 2026-09-29If both these commands succeed, you should see some output related to your academic license.
If the first command fails, then the Gurobi python module has not been installed correctly. If the second command fails, then the license has not been setup correctly (make sure the license file is at the right location).
If at any point, you need more information about Gurobi, then you can always go to the official Gurobi documention online or send the teacher an e-mail.